How to Shoot Portraits on Your Cell Phone in Different Light Position
How to Shoot Portraits on Your Cell Phone in Different Light Position : How are you going to exceptional navigate shooting portrait images, with your smartphone, in different light situations? It starts offevolved with information how poor lights can intervene along with your shoot. We’ll talking about difficult light scenarios and how you can improove their challenges with the right cellphone settings, tools, and compositions. So let’s shoot your dream with cellphone.
1. Working with Sun Flares
Sun flares also crop up in backlit pictures. At the same time as they may be pretty beautiful and are regularly delivered into photography in post-processing they can also be distracting, and from time to time blow out your Main subject.
Placing your body above your camera lens, you can stop any direct light to your camera’s sensor, thus reducing the chance of lens flares or eliminating it completely. There are also a growing number of smartphone camera attachments and accessories, such as a hooded lens, to block out any sun flares of light.
Alternatively, sun flares can be removed from your portraits in post processing softweres. The Google app Snapseed, for example, features a Healing tool that allows you to remove sun flares and any other imperfections in the shot.
To prevent sun flares, block out any direct mild hitting your digicam’s sensor. Meaning, you could are looking for colour underneath a tree or clearly vicinity a hand above your camera lens.
2. Photos Shoot in the Midday Sun
The midday solar is at its most powerful and harshest. This makes it one of the maximum unflattering resources of herbal mild when taking pictures portrait images. Maximum portrait photographers tend to avoid such lighting, because the solar beaming down at once overhead can result in unfavorable shadows on their concern’s face.
Scouting for a shady place is one way to keep away from the solar’s harsh rays. However, when coloration isn’t to be had, it’s quality to location your challenge with their backs to the solar (if feasible) to keep away from any squinting. The usage of artificial light, or a reflector of some type, can fill in the ones shadows.
For the reason that sun is excessive within the sky, it is going to be at its brightest, meaning you’ve got numerous natural light reflectors at your disposal.
Sand on the seashore is a pleasant herbal reflective surface, because the light bounces lower back onto your situation’s face and fills in shadows. Mild colored floors, or any herbal reflective surfaces, additionally do the trick.
Also Read
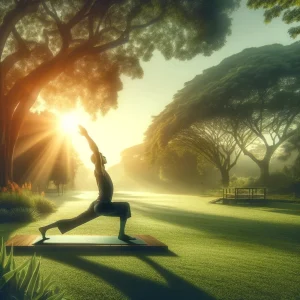
3. Shoot at Sunrise and Sunset
We’ve all visible breathtaking sunsets and sunrises. We’ve reached for our telephones to take a portrait, handiest to find out the beautiful image you thought you took doesn’t reflect what you saw.
As beautiful as those golden hours appear, they pose a large project for photographers. That is specially authentic when taking pictures photos, because the sky seems an awful lot brighter than the ground. Too often, these pictures can proportion the same fate as other backlit snap shots.
In addition to the low-light fixes for backlit pix provided above, New ND Grad clear out can tame the brilliant sky and divulge the foreground.
Think of this device as sunglasses on your camera. It darkens the scene to varying levels, primarily based on the strength of the clear out. You may truly add these filters to the the front of your phone digital camera lens, providing you with greater control over lights. Lighting fixtures all through the golden hour is smooth, subtle, and warm. Take benefit of this flattering light by means of going through your problem closer to golden rays of the sun, not status with their again to the light.
Positive, you gained’t capture the sunset or sunrise, but the radiance of the light will mission the golden hour light onto their faces.
The use of a 3/4 facial view is also a beneficial role. It could display the sunset or dawn, whilst illuminating the concern’s face in stunning smooth, golden mild.
4. If Your Subject Is Backlit
Backlighting is created while your situation is positioned with their returned going through the light source. This could be the projection of the sun or an artificial mild source. It can bring about a stunning halo impact or rather, a rim of light around your difficulty, generating a dramatic and dream like Best shot.
That said, it’s a particularly tough mild to paintings with, as it could bring about the underexposure of your problem. The depth of the light can overpower your concern’s face, generating harsh shadows or even a portrait silhouette.
5. Shoot Low Lighting Conditions
Capturing in low mild can be a quite frustrating experience. It frequently consequences in noisy, darkish images which might be prone to motion blur. Smartphone cameras generally tend to lengthen shutter pace to higher expose snap shots, that could most effective get worse these issues.
You need huge apertures, lengthy exposures, and balance to shoot in low mild. As technology advances, digital camera phones have become more equipped to shoot in low mild situations.
For instance, the modern IPhone 13 seasoned Max feature the most superior cameras on iPhones. They feature all-new extensive cameras with large sensors of 1.9 µm pixels. This results in much less noise and faster shutter speeds across all lighting conditions.
In low-light eventualities, it’s sensible to take advantage of your phone’s night Mode settings. Low-light photography mode is going by using exclusive names relying in your telephone’s manufacturer.
Google calls it night time Sight. Samsung calls it vibrant night time. Apple calls it the night Mode icon—a yellow moon that routinely pops up on the pinnacle of your digital camera’s display in low-mild environments. By keeping the shutter open for an extended time, you permit greater to be had light to light up the image. Extending the exposure for your smartphone, relies upon on its producer.
On an iPhone, as an instance, use the slider above the shutter button to select Max, which extends the capture time. Whilst you press the shutter button, the slider turns into a timer that counts you down till the stop of the seize time.
For best results, place your telephone on a solid floor, or use a tripod to boom balance and exposure clarity.
More Interesting News
6. Best For Using Portrait Mode
To start, Portrait Mode creates a intensity of area impact, so your difficulty clearly pops before a blurred historical past. It essentially recreates photos taken on a DSLR or mirrorless digicam with a protracted lens and shallow intensity of subject.
Apple’s Portrait lighting fixtures function makes it feasible to apply forms of photographic lights in your photographs, depending to your needs and wants.
These aren’t filters. Instead, they trade the way light suggests up to your subject and may make your photo appearance stylised. There are six Portrait lights results, so irrespective of what lighting fixtures state of affairs you locate your self in, you could locate your high-quality setting.
Herbal mild is the default setting and continues your pix looking as herbal as viable. But, in low-mild situations, this is probably your maximum best alternative.
Studio light permits you to liven up your subject’s face, at the same time as Contour light provides shadows to create a greater described look.
Stage mild blacks out the history. high Key-Mono is similar to degree mild Mono. However, there’s an choice to make the history white rather than black.
Seasoned tip: Did you recognize Portrait Mode has its very own brightness slider? To get right of entry to it, simply faucet on in which you need to awareness in Portrait Mode, then drag your finger up or down on the solar icon next to the yellow attention box.
7. Using With Manual Mode
One of the exceptional approaches to mitigate the demanding situations of light is to manually modify settings, inclusive of shutter speed and ISO. Many Android and home windows phones have a guide Mode feature.
There are, however, a plethora of apps, which include VSCO, Manua camera DSLR that let you tailor those settings in your desires.
Tough mild situations frequently require a few experimentation to figure out what works. The hints cited above can be used as your manual. Return each time you want a refresher, but in the long run, not anything beats right ol’ trial and blunders.
So, grasp your Cellphone, take pics in diverse lights, and have a lot of fun!
Disclaimer: All Images that are Used in this post from Instagram & Google Image and Credit Goes to their Respective Owner. Contact Us on this Email contact@thalabhula.com for Credit or Remove these Images.
- best mobile photography
- Cell Phone
- Cell Phone photography
- Different Light Position
- mobile photography course
- mobile photography ideas at home
- mobile photography pose
- mobile photography tips
- mobile photography website
- phone photography ideas
- Shoot Portraits
- simple photography ideas at home with phone
How to Create Cinematic Fill Light Tutorial
Related Post

Trending topics
Recent post

Happy New Year Offer with Hosting and Domain


World Music Day 2024 Quotes, Images


Malala Day Quotes Wishes and Whatsapp Status

Shutterstock Reviews & Full Details

History Of The Slot Machine